Start the project
Objectives
Think about structure of the files and folders for the project
Think about documentation already
Note
Many projects/scripts start as something for personal use, but expands to be distributed.
Let’s start in that end and be prepared.
The following steps can be very valuable for you in a couple of months as well as you revisit your code and don’t know what it does or why you did this and that.
Order your files!
Think that everything is worth to be part of documentation (like GitHub directory tree)
The parts from the software development cycle
The planning parts
Requirements:
what should the program deliver
dependencies
OS platforms
Risk analysis
Design documentation
Analysis: pseudo code and UML
Source code
with in-code documentation
README
(Full documentation)
(Tutorial)
Directory structure
Different projects should have separate folders
ReadMe file
Data (version controlled)(.gitignore)
Processed data intermediate
(Manuscript)
Results data, tables, figures (version controlled, git tags for manuscript version)
Src version controlled code
License (here or in the 1st level)
Requirements.txt
Doc
index
Note
If software is reused in several projects it can make sense to put them in its own repo, not connected to a specific research project
Start with a new GitHub project
Note
For the course project we do it in this order, but that is not necessary in all cases.
Typically you may start locally in Git repository and later push to a GitHub repository (more next session about Git)
The reason for starting here is that we can get our PlantUML render in the browser!
Type-along: Create a new repository on GitHub
Type-Along
Make sure that you are logged into GitHub.
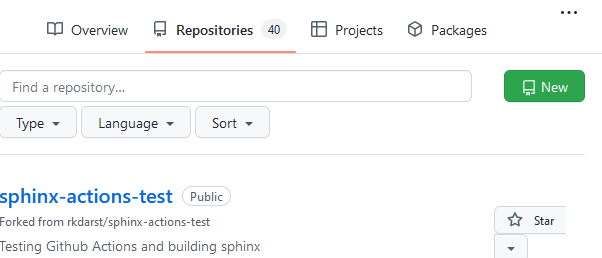
To create a repository we either click the green button “New” (top left corner).
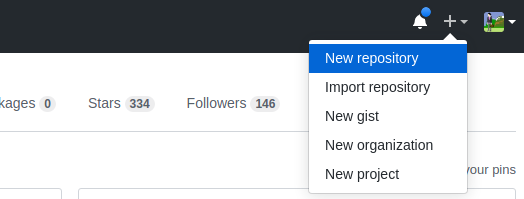
Or if you see your profile page, there is a “+” menu (top right corner).
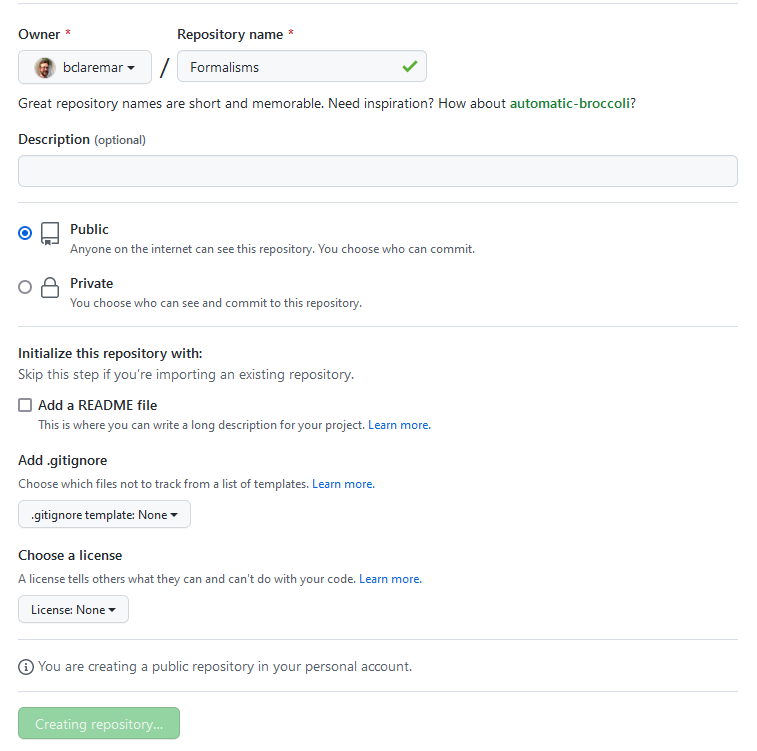
On this page choose a project name, e.g. planets-<username>
the name there so there are no clashes when/if you collaborate and fork other repositories)
For the sake of this exercise do select “Initialize this repository with a README” and “Choose a license”
Let’s choose MIT (we may discuss this later on
Done!
Let’s view the license!
There are prewritten text for the different types.
More info at Licensing
README files
Advantages
Versioned (goes with the code development)
It is often good enough to have a
README.mdorREADME.rstalong with your code/scriptA great guide to README files: MakeaREADME
Keypoints
README file should include:
A descriptive project title
Motivation (why the project exists)
How to setup
Copy-pastable quick start code example
Recommended citation
We are ready to
Extend the README file
Make some folders according to the above list
Put the planning documents in a docs folder
10 min
Extend the README file a little bit with an About section in Markdown format describing the project.
Use the Pencil button
Use the goals stated in last session, Analysis
Get inspiration from https://www.makeareadme.com/ and a favorite Git repo or https://github.com/yampelo/beagle.
**Cheat sheet**
# This is a section in Markdown

## This is a subsection

Nothing special needed for
a normal paragraph.

    This is a code block


**Bold** and *emphasized*.

A list:
- this is an item
- another item
Create the planning document in markdown Add file button and choose “Create file”.
Call the file
doc/plan.mdthis will on the fly create the directory
doc.
Copy paste the example code found in the last session for PlantUML and pseudocode.
Type
"```uml"(without “) above the UML code and"```"below, and it should render nicely.Type
"```code"(without “) above the pseudo code and"```"below, and it should render nicely.
Add some suitable headings for the code sections
Solution
Plan
Background
The climate last about 1 million years has been largely determined but the change of the eccentricity (elongation) of Earth’s orbit (One of the Milankovitch cycles).
The glacial cycles (daily speaking: ice ages) with a period of about 100 000 years are thought to be due to this.
Theory: The gravity form the other planets, especially Jupiter, causes the change of the eccentricity
Problem: Reproduce Milankovitch cycle of eccentricity (100ka)
Method: Use Python
Let’s go for functional programming
Input: Some initial positions of the planets but no external data
Perhaps also user input of length of simulation
Output: Graph of orbits and a timeseries of an eccentricity parameter
Development steps (we extend the program with iterations)
Earth-sun system
Add Jupiter
Make modular
Add more planets?
PlantUML
@startuml
skin rose
title Planet flowchart
start

:define some parameters;
:initialize earth (and Jupiter);

repeat
  :calculate new position;
  :calculate acceleration;
  :calculate velocity in two dimensions;

repeat while (simulation time is met) is (no)
->yes;
:figure plotting;
stop
Pseudocode
Define constants
Define initial values
	positions
	velocity (balance of gravity and centrifugal force)
(Allocate (book) space for long vectors	plan iteration)
Iteration
	Change of positions
	Calc acc (gravity)
	Calc new velocity
Plot resulting ellipses
Calculate orbit parameters
Plot time series of parameter change
What is Git, and what is a Git repository?
Git is a version control system: can record/save snapshots and track the content of a folder as it changes over time.
Every time we commit a snapshot, Git records a snapshot of the entire project, saves it, and assigns it a version.
These snapshots are kept inside a sub-folder called
.git.If we remove
.git, we remove the repository and history (but keep the working directory!)..gituses relative paths - you can move the whole thing somewhere else and it will still workGit doesn’t do anything unless you ask it to (it does not record anything automatically).
Multiple interfaces to Git exist (command line, graphical interfaces, web interfaces).
Concepts in Git
repository: The project, contains all data and history (commits, branches, tags).
add: Stage you files (collect what to be added to the git record — a kind of middle step)
commit: Snapshot of the project, gets a unique identifier (e.g.
c7f0e8bfc718be04525847fc7ac237f470add76e).cloning: Copying the whole repository to your laptop - the first time. It is not necessary to download each file one by one.
git clonecopies everything: all commits and all branches.Branches on the remote appear as (read-only) local branches with a prefix, e.g.
origin/main.We synchronize commits between local and remote with
git fetch/git pullandgit push.
Before we continue we need to configure Git
Prerequisites
Git and GitHub should be configured prior to the course following Setup.
Test:
ssh -T git@github.comOutput should be something like this:
Hi bclaremar! You've successfully authenticated, but GitHub does not provide shell access.
Being comfortable with the command line. No expertise is required, but the lesson will be mostly taken from the command line.
Students should be familiar with using a text editor on their system.
Emacs and Vim are excellent choices if you know how to use them
but Nano or
Notepad on Windows are sufficient.
Attention
Start your terminal of choice
Terminal in Visual Studio code
MAC terminal
iTerm (Mac)
Git BASH (Windows)
WSL (Windows subsystem Linux) environment in
MobaxTerm
Powershell
PowerShell
If you haven’t already configured Git, please follow the instructions in the installation instructions.
$ git config --global user.name "<Your Name>"
$ git config --global user.email <your GitHub-connected email address>
$ git config --global core.editor nano
or replace nano with another editor, like in Windows: notepad
Verify with:
$ git config --list
Also, test:
ssh -T git@github.comOutput should be something like this:
Hi bclaremar! You've successfully authenticated, but GitHub does not provide shell access.
Cloning our Plane repository to local
Now you and other people can clone this repository and contribute changes.
Type-Along
You may want to create a directory for this course. You can do it in the normal way or use your terminal, like this in a good place (like “Courses” if you have that)
cd Coursesmkdir Programming_formalismscd Programming_formalisms
In GitHub, locate the Code button, select SSH and click the copy symbol to the right
Back in your terminal type
git clonefollowed by pasting the copied text.The result shall look something like this:
$ git clone git@github.com:<user>/planet-<user>.git
Tip
Using the SSH makes it very straight-forward to upload your local changes back ot GitHub. Use HTTP if you clone repos that do not belong to you or your group.
This creates a directory called
planet-<user>unless it already exists.
What just happened?
cdthe new directory that was createdlist the files with
lsThink of cloning as downloading the
.gitpart to your computer.After downloading the
.gitpart the branch pointed to by HEAD is automatically checked out.
Working on GitHub
You can do basically the same work at GitHub as in your local git repo
The graphical view makes it easier to work with in everyday editing work at least.
Depends on your own preferences of course.
Here your commit each file at a time with the “commit button”.
No staging that is.
Be aware of that feature!
GitHub Actions are workflows defined by you, like:
for automatic testing after each commit (Used in the test lessons)
for GitHub Pages, briefly covered in last session today or Extra reading: Documentation.
Parts to be covered
☑ Planning
Pseudocode
Unified Modelling Language
☐ Testing
Different levels
We don’t do this today!
☑ Source/version control
Git
We have a starting point!
GitHub as remote backup
☐ Collaboration
GitHub
☑ Sharing
☑ open science
☐ citation
☑ licensing
☐ Documentation
Keypoints
A repository can have one or multiple remotes (we will revisit these later).
A remote (GitHub) in this case serves as a full backup of your work.
Code development might be easier to develop in the local git repo since you can run and test locally in an easy way.